Posted on Leave a comment

Meet Mike

How long have you worked for the Green Room? 

I joined the Green Room team 3 years ago – and it’s been a busy 3 years!

What did you do before you joined the Green Room Team?
Before I worked here I was a Senior Marine Safety Technican for 26 years. It’s been quite a change but being out and about in the van keeps me busy.

Do you spend much time in your garden?

I spend a lot of time in my garden. I’m at my happiest pottering about and seeing what’s growing. There’s always something to do.

What’s your favourite time of year and why?

Definitely Summer. I like the long light nights as I can get outside and enjoy the garden, whether I’m gardening or just sitting in it enjoying the fruits of my labour!

When you’re out delivering, what’s on your playlist?I normally listen t

radio 2 when I’m delivering – it’s got a good variety of music to listen to.

Posted on Leave a comment

Team Talk – Meet Michael

You may have seen Michael out and about in our Green Room florist van delivering our arrangements in and around Fife. Give him a wave next time!

How long have you worked for the Green Room? 

I started working with them in 2021 after I retired, it’s been a quick 3 years!

What did you do before you joined the Green Room Team?

MI manager with Lloyds Banking Group for a long time. So this is a big change but I like keeping busy.

Do you spend much time in your garden?

Well I’m a bit fairweather ! But during the spring and summer I’m outside at least once or twice a week, just pottering. I do enjoy the warmer weather and seeing the garden starting to bloom.

What’s your favourite time of year and why?

Summer. It rains less, but blooms more! And I love seeing the hydrangeas come out, they’re a definite favourite.

When you’re out delivering what’s on your playlist?

Elvis!

Posted on Leave a comment

Plant your own hanging basket

A hanging basket is a sign that summer is definitely on its way.  The variety of colour and heights are a sight to behold. From trailing petunias to lobelia and begonias, you’ll have colour until the end of Autumn.

Here at the Plant Market, we have pre-planted hanging baskets but if you fancy giving it a go yourself we’ve got a step by step guide (don’t worry, it’s easy-peasy!);

Step 1

Add a liner to the basket so it fits well, then cut holes in it for the trailing plants – but don’t cut the holes too big otherwise the compost could fall out

Step 2

Pop the basket on a bucket and fill it one third full with (peat-free multi purpose) compost. This will raise it to a comfortable level to work with and prevent it from wobbling around as you plant. Remove the chain from the hanging basket so that when you have completed your creation you won’t rip all the plants off when you lift the chain back round. Then feed the trailing plants through the holes.

Step 3

Add more compost then place in other plants, making sure that their rootballs don’t touch the sides. Then cover with more compost.

Step 4

Give it a good water then hand up in a sunny spot. And enjoy!

Remember that hanging baskets need a fair amount of watering so keep an eye on it. You can also add in some soil-based compost which will help retain moisture.

If you need any help or advice, just pop in or give us a call!

Posted on Leave a comment

BRAIN BOOSTING BLACKCURRANTS!

Blackcurrants are often overlooked when it comes to the ‘superfood’ list. But these wee berries are now being recognised a plant powerhouse. Packed full of flavonoids, a serving of these once a day is thought to lower the risk of cognitive decline by 20%! Here are a couple of our favourite ways with blackcurrants.

Blackcurrant cordial

Ingredients

300g golden caster sugar

zest and juice 2 lemons

450g blackcurrants

Method

STEP 1

Put the sugar in a large saucepan with 300ml water. Bring to a simmer then add the lemon zest and juice followed by the blackcurrants. Cook the mixture over a medium heat until the blackcurrants start to soften and burst.

Blackcurrant compote

This is an easy peasy recipes that you can add to yoghurt for breakfast or swirled into ice cream. You can even freeze it in individual portions and use over a 3 month period.

Ingredients

juice ½ lemon

500g blackcurrants

100g golden caster sugar

Method

STEP 1

Put 2 tbsp water and the lemon juice in a large saucepan, bring to the boil, then add the blackcurrants and simmer until broken down.

STEP 2

Tip in the golden caster sugar and bring to 105C on a temperature probe. Pour into sterilised jars and leave to cool. Will keep in the fridge for up to 3 weeks.

Posted on Leave a comment

Healthy heart tomatoes

Tomatoes have long been known for the vitamins C and E they contain however new research suggests lycopene, the pigment that gives them their colour can promote a healthy hear through lowering cholesterol and reduce the risk of heart disease. Here are a couple of staple recipes from the Plant Market team!

Roasted cherry tomato sauce

Ingredients

2–3 lbs cherry tomatoes, stems removed

1/4 cup good-quality olive oil, plus more for roasting

1 large yellow onion, diced

1 Tbsp fresh garlic, minced

small handful of fresh basil leaves

3–4 sprigs, fresh thyme, stems removed

kosher salt and freshly-ground black pepper, to taste

Instructions

Preheat the oven to 400℉.

Toss the tomatoes with just enough olive oil to lightly coat, then spread out in an even layer onto a rimmed sheet pan or large baking dish. Roast for 25-30 minutes, until the tomatoes have burst and are just beginning to shrivel. Remove from the oven, tent loosely with foil, and set aside.

Meanwhile, add the 1/4 cup of olive oil to a heavy-bottomed sauce pot. Heat over medium-heat until the oil begins to shimmer. Add the onions and cook, stirring occasionally, until they begin to sweat and soften, about 4-5 minutes.

Add the garlic, stir to combine, and continue cooking for another few minutes until the garlic is golden.

Add the roasted tomatoes (including all of the cooking liquid in the pan), and the herbs, and stir to combine. Season with salt and pepper, to taste.

Turn the heat down to low, partially cover the pot with the lid (leaving about a 1-inch gap), and let simmer for at least 25 minutes – and up to an hour – stirring infrequently as the sauce cooks.

Remove the pot from the heat, and let cool for 10-15 minutes. Transfer the sauce to a blender and blend until the sauce reaches your desired consistency.

Pour the sauce into air-tight containers. Will keep for up to a week in the refrigerator, or 3 months in the freezer.

Orzo with cherry tomatoes and spinach – This is a lunchbox favourite of ours!

Ingredients

400g orzo pasta

2 tbsp olive oil

1 celery heart, chopped

1 red onion, chopped

3 garlic cloves, chopped

800g of cherry tomatoes

250g baby spinach

10 black olives, halved

small handful dill, chopped

small handful mint, chopped

Method

STEP 1

Cook the orzo following pack instructions. Drain, rinse under cold water, drain again and toss with half the olive oil.

STEP 2

Meanwhile, heat the remaining oil in a large sauté pan. Add the celery, onion and some seasoning, and cook for 8 mins until soft. Add the garlic, cook for 1 min, then tip in the cherry tomatoes and simmer for 10 mins. Add the spinach, cover with a lid to wilt the leaves, then add the orzo, olives, dill and mint. Season and serve.

Posted on Leave a comment

Cracking Kale

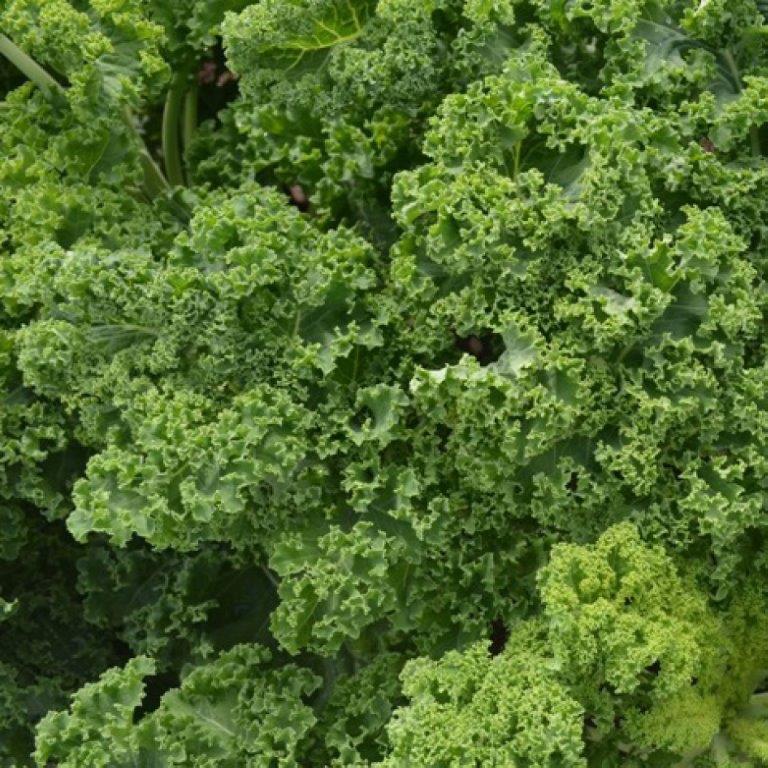
Kale is often touted as a superfood as it contains four times the vitamin C content and twice the selenium content of spinach, as well as nutrients like vitamin E and beta-carotene. These are all important for supporting a healthy immune system. It also contains calcium and potassium which are thought to help bone and heart health.

Coconut and kale fish curry

Ingredients

1 tbsp rapeseed oil

1 onion, sliced

thumb-sized piece ginger, sliced into matchsticks

1 tsp turmeric

3-4 tbsp mild curry paste (Keralan works well)

150g cherry tomatoes, halved

150g kale, chopped

1 red chilli, halved

325ml reduced fat coconut milk

300ml low-salt stock

250g brown rice

100g frozen king prawns

2 cod fillets, cut into chunks

2 limes, juiced

½ small bunch coriander, chopped

handful of toasted coconut flakes (optional)

Method

STEP 1

Heat the oil in a casserole dish. Cook the onion with a pinch of salt for 10 mins until it starts to caramelise. Stir through the ginger, turmeric and curry paste, and cook for 2 mins.

STEP 2

Add the tomatoes, kale and chilli, and pour in the coconut milk and stock. Simmer for 10-15 mins or until the tomatoes begin to soften. Scoop out the chilli and discard.

STEP 3

Cook the rice following pack instructions. Gently stir the prawns and cod through the curry, then cook for another 3-5 mins. Squeeze over the lime and stir through half of the coriander. To serve, scatter over the remaining coriander and the coconut flakes, if you like. Serve with the rice.

Kale pesto

This is super handy to keep in the fridge and whip up a quick tasty supper. Or you can use it when making our recommended recipes with beetroot!

Ingredients

85g pine nut, toasted

85g parmesan (or vegetarian alternative), coarsely grated, plus extra to serve (optional)

3 garlic cloves

75ml extra-virgin olive oil, plus extra to serve

75ml olive oil

85g kale

juice 1 lemon

spaghetti or linguine, to serve

Method

STEP 1

Put the pine nuts, Parmesan, garlic, oils, kale and lemon juice in a food processor and whizz to a paste. Season to taste. Stir through hot pasta to serve, topping with extra Parmesan and olive oil, if you like.

STEP 2

To store, put in a container or jar, cover the surface with a little more olive oil and keep in the fridge for a week, or freeze for up to a month.

Posted on Leave a comment

Cleaning your greenhouse

Keeping your greenhouse clean

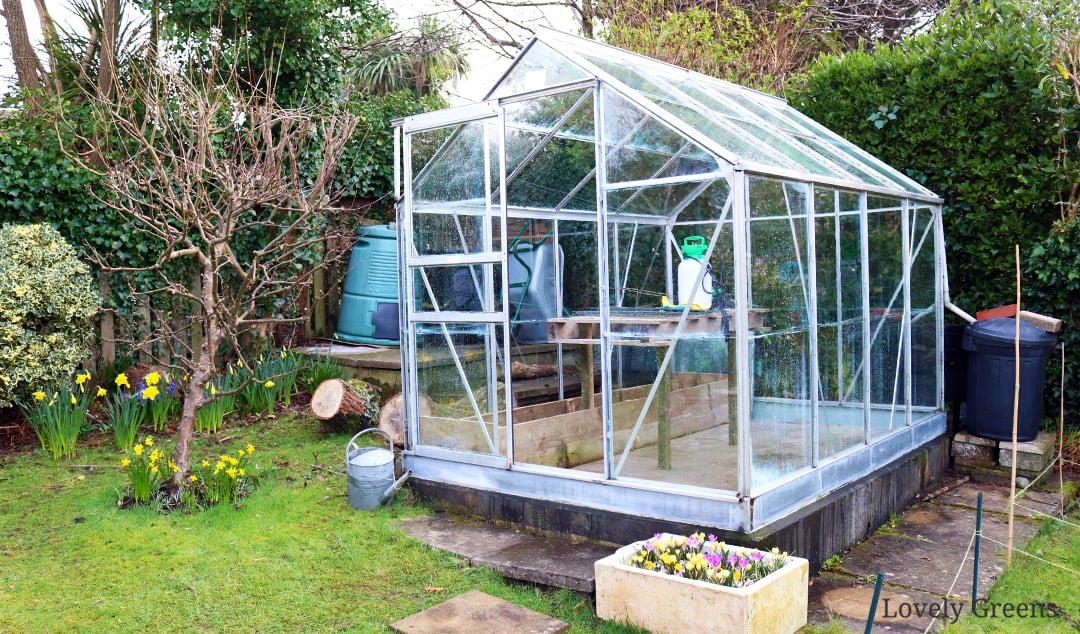
Cleaning a greenhouse is an important task to keep the environment healthy for your plants. Here are some general steps to follow:

  • Remove all plants, pots, and debris from the greenhouse. This includes any dead leaves or plant material on the floor.
  • Sweep the floor and remove any remaining debris.
  • Wash the walls and ceiling of the greenhouse with a mild soap and water solution. This can be done using a soft-bristled brush or a sponge.
  • Rinse the walls and ceiling with clean water to remove any soap residue.
  • Clean any windows or other glass surfaces with a glass cleaner and a soft cloth.
  • Disinfect all surfaces with a disinfectant solution. This is especially important if you have had any problems with pests or diseases in the past.
  • Rinse all surfaces thoroughly with clean water to remove any remaining disinfectant.
  • Allow the greenhouse to dry completely before returning any plants or equipment.

Remember to wear protective gear, such as gloves and eye protection, when cleaning with soap or disinfectants.

When should I clean my greenhouse?

Before planting new crops: Before you start planting new crops, it’s important to clean your greenhouse thoroughly. This will help prevent the spread of diseases from the previous season to the new crops.

Regularly throughout the growing season: It’s a good idea to clean your greenhouse regularly throughout the growing season to maintain a healthy growing environment. This can include sweeping the floors, wiping down surfaces, and removing any plant debris.

Whenever you notice pests or diseases: If you notice pests or diseases in your greenhouse, it’s important to clean it thoroughly to prevent their spread. Remove any infected plants and clean all surfaces with a disinfectant.

At the end of the growing season: Once your plants have finished producing for the season, it’s a good time to clean your greenhouse. Remove all plant debris, including fallen leaves, stems, and roots. This will help prevent the build-up of harmful pests and diseases.

Overall, it’s best to establish a regular cleaning schedule for your greenhouse, as this will help prevent the build-up of pests and diseases and ensure that your plants stay healthy.

Posted on Leave a comment

Sowing and harvesting

With the arrival of our soft fruit and veg,  we’ve pulled together a quick overview of the best time to sow and harvest these colourful foods!

KALE

  • Sow outdoors from late spring to early summer, typically between mid-May and mid-July.
  • Kale can be harvested from late summer to early winter, typically from September to March.
  • Some varieties of kale can be harvested as early as mid-summer, while others can be left in the ground until the following spring. The exact harvest time will depend on the variety of kale

TOMATOES

  • Sow tomato seeds indoors from late February to early April
  • Plant out in a greenhouse or a sunny, sheltered spot outdoors from late May to early June.
  • Outdoor tomatoes are ready to harvest from August to October, while greenhouse-grown tomatoes can be harvested from June to October.

BEETROOT

  • Sow outdoors from late April to July, depending on the variety and weather conditions. For early crops, sow under cover in modules or pots from late March to early April and transplant outside when the seedlings are established and the weather has warmed up.
  • Harvest when they reach around 2-3 inches (5-8 cm) in diameter, from July to October.
  • Beets can be harvested earlier for baby beets or left in the ground longer for larger, more mature beets.

BLACKCURRANTS

  • Plant in the spring, usually from March to May
  • Harvest from June to August
  • Blueberries are a relatively low-maintenance crop, but they need acidic soil
  • Protect blueberry plants from birds, as they can be a common pest
Posted on Leave a comment

Poinsettia Facts!

The arrival of poinsettias always means we’re into the festive season!  Their bright red leaves are instantly recognisable and have come to signify Christmas time here in the UK. But did you know that the plants are actually native to Central America?

We’ve pulled together some facts about this very popular Christmas plant;

  • Ancient Aztecs used the flowers to make a purple dye for clothes and cosmetics and the milky white sap was made into a medicine to treat fevers
  • The poinsettia was made famous by a man called Joel Roberts Poinsett. He was the first Ambassador from the USA to Mexico in 1825. Poinsett had some greenhouses on his plantations in South Carolina. When visiting Mexico he was fascinated by the plants and sent some back to his home in South Carolina and began growing them and sending them to friends and botanical gardens.
  • They were first sold as cut flowers at a flower show in Philadelphia
  • In the early 1900s they began to be sold as whole plants for landscaping and pot plants.
  • It is believed that they became known as Poinsettia in the mid 1830s when people found out who had first brought them to America from Mexico.
  • The Poinsettia is also the national emblem of Madagascar.

There is an old Mexican legend about how Poinsettias and Christmas became intertwined.*

There was once a poor Mexican girl called Pepita who had no present to give the baby Jesus at the Christmas Eve Services. As Pepita walked to the chapel, sadly, her cousin Pedro tried to cheer her up.
‘Pepita’, he said “I’m sure that even the smallest gift, given by someone who loves him will make Jesus Happy.”

Pepita didn’t know what she could give, so she picked a small handful of weeds from the roadside and made them into a small bouquet. She felt embarrassed because she could only give this small present to Jesus. As she walked through the chapel to the altar, she remembered what Pedro had said. She began to feel better, knelt down and put the bouquet at the bottom of the nativity scene. Suddenly, the bouquet of weeds burst into bright red flowers, and everyone who saw them were sure they had seen a miracle. From that day on, the bright red flowers were known as the ‘Flores de Noche Buena’, or ‘Flowers of the Holy Night’.

The shape of the poinsettia flower and leaves are sometimes thought as a symbol of the Star of Bethlehem which led the Wise Men to Jesus. The red coloured leaves symbolize the blood of Christ. The white leaves represent his purity.

So now you know!

*Source – whyChristmas.com

Posted on Leave a comment

Caring for your poinsettia

Poinsettias are a gorgeous Christmas plant. Many people find they start to die away after the festive season is over, but with the right care, poinsettias can keep giving you colourful bracts. Here’s how;

  • Make sure you choose a healthy plant that has been kept away from draughts so all you have to do it water it over the festive period
  • Don’t overwater them, they prefer to be on the drier side.
  • You should only water them when the surface of the compost is dry. Water the plant from the bottom, never from the top.
  • Into the new year, you can feed your poinsettia with a tomato feed once a month to keep it going. Don’t worry if they start to lose some of their leaves, it’s a normal cycle in January and February
  • Come April, prune back the plants to about 10cm and keep at a temperature of around 13C
  • In early May, repot the poinsettia, using a mix of 3 parts compost with one part grit and grow them in a light, cool place throughout summer – keeping them at a temperature of 15C – 18C
  • To ensure your poinsettia will bloom for Christmas they will need their days shortened – starting in September. They need on average 8-10 weeks of short days (aim for less than 12 hours of light.
  • Cover the plant or place in a dark room after twelve hours of daylight every day and protected from artificial light sources keeping them at a constant temperature of 18C

If you decide to give it a go, send us your results!