Posted on Leave a comment

Looking after houseplants in winter

With the setting back of the clocks, the colder, darker days are beginning to set in. But with the proper care and attention, you can ensure your houseplants thrive even as daylight becomes scarcer.

The Horticultural Trades Association (HTA) and Tropical Plants UK have shared their top tips for caring for your houseplants during the winter months.

Watering: less is more

When it comes to watering your houseplants, ‘less is more’ is a good rule of thumb at any time, and even more so in the last few months of the year, when overwatering can easily lead to root rot and other issues. Plants take up as much oxygen by their roots as they do by their leaves, but the shorter days naturally mean a reduction in the amount of light available to them. Giving your houseplant a moderate amount of water and allowing its compost to dry between waterings will promote root growth, which can be affected by the dark winter days.

Make your water wetter

In most cases your plant will tell you when it needs water – it may go from a vibrant green to a green-grey colour, or start to wither, or the stem might tilt in one direction. Just a small amount of tepid water – that’s ideally been boiled and then allowed to cool to about 20 degrees Celsius – should restore your houseplant to full health. And adding just one or two drops of washing up liquid will make your water ‘wetter’ and mean you need only use about half the amount.

Floral compass

You might be able to put your plant near a window and hope for the best during the summer months, but in winter, it’s not so simple. You should be led by the direction of your windows: south-facing windows attract the most light and heat all year round, while those that are north-facing see the least amount of light. East- and west-facing windows fall somewhere in between, with those facing west producing slightly more light.

More often than not, when a plant loses its leaves during the winter, it’s because of a lack of light. Even those that enjoy some shade during brighter months – like a Monstera Deliciosa (also known as a Swiss cheese plant) or a Ficus – should be moved to south-facing windows in the winter.

Winter winners

If you’re thinking about adopting a new houseplant and wondering which types fare well in the winter, look no further than the tropical jungle. Dracaenas, Epipremnums (commonly known as Devil’s Ivy or Pothos), and Philodendrons are resilient all year round, but they especially thrive in the winter. That may seem strange, but it’s because they’re adept at surviving in very low light levels, with about 95% of sunlight being filtered out by the time it gets to the dark forest floor.

Contrary to popular belief, poinsettias – a flower synonymous with Christmas – require a lot of discipline to succeed in winter. They need as much light as they can possibly get during the daytime – preferably from a south-facing window – followed by 12-13 hours of darkness, continuously for a period of about 8 weeks, to achieve their iconic vivid red colour. Moving your poinsettia from the window to the table to use it as a centrepiece in the evenings could be an easy solution to this – just remember to put it back at its window the next morning.

Living feature

Placing your houseplant in a lightbox or under a spotlight could have the dual effect of exposing it to more light, while also making it a living feature in your home. During the festive period, adorn your houseplant with fairy lights and baubles for a less expensive, more sustainable alternative to a Christmas tree. Ficus Benjamina, Palms and Yuccas, which can grow up to six feet tall, are the perfect candidates for this.

*With thanks to the HTA 


Posted on Leave a comment

Pumpkin pointers!

It is the perfect time of year to enjoy your pumpkin and/or squash crop.  Halloween means creating brilliant pumpkin designs but it’s important to remember that pumpkins are a great food source. And they taste even better if you’ve grown them yourself.

A recent study showed that waste from Halloween celebrations included eight million pumpkins which became food waste.

So how to get the best out of your pumpkin? As long as you haven’t painted your pumpkin, you can reuse it. However, remember that while most pumpkins are edible to both animals and humans, double check  that you have an edible pumpkin before you cook it.

Everything from inside your pumpkin can be recycled or used. Pumpkin innards, the stringy orange mess can be roasted, or pureed for cooking in soups.

When you’re scooping out the innards, save the seeds as they’re a brilliant snack for human or birds and squirrels.

The team here love a roasted pumpkin seed! Just follow the steps below for a tasty treat;

  • Pull out all the pumpkin innards and then to separate the stringy pumpkin innards from the seeds themselves.
  • Rinse the seeds thoroughly and spread them over a large baking tray.
  • Choose what you want to flavour your pumpkin seeds with, you could opt for paprika, sea salt, chilli flakes. Cover the seeds in your flavour and in a few glugs of olive oil.
  • Bake them at 180 degrees C for about ten minutes.
  • Voila! Tasty seeds for salads or sprinkled on soups!

Can I plant the pumpkin seeds?

Yes you can! A brilliant way to grow your own is to plant the seeds from this year.

Remove the seeds from the pumpkin, make sure they are dry and clean. Spread them out on a piece of paper towel and then leave them to dry in a cool dry area. Then they’re ready for planting.

Planting pumpkin seeds is usually done a month before the last frost in the new year, so that your crop is ready for late summer/autumn time, although you can still plant pumpkin seeds as late as May.

After Halloween (as long as they’re not painted), you can leave the pumpkin outside to feed the birds. Or pop it onto the compost heap.

Recipe inspiration

It’s definitely the time of year to be making soup! One of our favourites is a Thai pumpkin soup;

Ingredients

  • 5kg pumpkin (or squash), peeled and roughly chopped
  • 4 tsp sunflower oil
  • 1 onion, chopped
  • 1 tbsp grated ginger
  • 1 lemongrass, bashed a little
  • 3-4 tbsp Thai red curry paste
  • 400ml can coconut milk
  • 850ml vegetable stock
  • Lime juice and sugar, for seasoning
  • 1 red chilli sliced, to serve (optional)

STEP 1

Heat oven to 200C/180C fan/gas 6. Toss the pumpkin or squash in a roasting tin with half the oil and seasoning, then roast for 30 mins until golden and tender.

STEP 2

While the pumpkin is roasting, put the remaining oil in a pan with the onion, ginger and lemongrass. Gently cook for 8-10 mins until softened. Stir in the curry paste for 1 min, followed by the roasted pumpkin, all but 3 tbsp of the coconut milk and the stock. Bring to a simmer, cook for 5 mins, then fish out the lemongrass. Cool for a few mins, then whizz until smooth with a hand blender, or in a large blender in batches. Return to the pan to heat through, seasoning with salt, pepper, lime juice and sugar, if it needs it. Serve drizzled with the remaining coconut milk and scattered with chilli.

Enjoy!


Posted on Leave a comment

Protect your tender plants

There’s definitely been a drop in temperature these last few days and it reminds us that winter is on the way. Autumn can be very mixed, but a sudden cold snap can create havoc on your tender plants. Tender plants are often plants that come from warmer climes aren’t used to frost and will likely die off if not protected.  It’s important to keep an eye on the forecast, especially frost, and take appropriate measures to protect your plants accordingly. If you’re not sure if a plant is hardy, check its country of origin and that will give you a clear idea.

Many of us have big containers of tender plants sitting outside during the winter so make sure you cover these with a horticultural fleece to protect them. Don’t put a plastic bag over them as the plastic can hold on to the moisture and doesn’t let the air flow round them. This creates a fungi that will finish them off! You can cover terracotta and ceramic pots with bubble wrap as this will ensure they don’t fracture in the cold. But try to move pots closer to the house to shelter them.

Ideally, you should overwinter plants indoors, in a frost-free greenhouse or frame.

  • The plants will still need watered but keep it to a minimum. Too much water will make the roots soggy and start to rot.
  • If you see any pests, you’ll need to eliminate them as soon as possible!
  • Remove any faded leaves and cut off any dying stems.
  • Don’t worry about feeding the plants during the winter as they can use the nutrients at this time of year.
  • Make sure there is good air circulation round them.
  • Keep an eye on the temperature – you need to make sure night temperature is high enough to deal with any frosts.

We have a few tender favourites amongst the team that can be overwintered;

Osteospermums – these bright border daisies will cope with a mild winter but it’s safer to overwinter. Just op the cuttings in modular trays in the greenhouse.

Fuchsias – there two types of fuchsia – the hardy and the not so hardy! If you have a tender fuchsia, cut it back, pot it up and place in the greenhouse. You can then take cuttings in early spring which can be planted in May when there is little chance of frost. (Although in Scotland you never know!)

Dahlias – a particular favourite of our colleague Colin.  You can dig up the tubers after the first frost to store until the spring or you can overwinter them outside under a thick layer of compost mulch. Come late winter, you can poot up tubers and take cuttings from the shoots that emerge.

If you have any questions, please do get in touch, we’d be delighted to help!

Posted on Leave a comment

Trimming tips

It’s that time of year to be trimming hedges in order to keep them tidy and healthy. It’s important to get them cut before the first hard frost as this will allow them to recover before winter sets in. We’ve pulled together some tips from the team to help trim well!

First things first, have you got the right tools to trim? Depending on the type of hedge, you’ll need sharp hedge shears or an electric hedge trimmer. A hand pruner may also be useful for smaller branches.

Before you start trimming, take the time to check the hedge’s condition and shape. Identify areas that need more attention and decide on the desired shape you want to achieve. Trim the hedge in a slightly tapered shape, with the top narrower than the base. This shape allows sunlight to reach the lower branches, promoting even growth.

Once you’ve assessed the hedge, remove dead or diseased growth. Cut these back to healthy growth to encourage new growth in the spring.

While trimming, avoid cutting too much at once, especially if the hedge has grown significantly. Overly severe cuts can stress the plants and affect their health. You want to aim for a natural and slightly rounded or flat top, depending on the hedge’s type and how you want it to look.

Remember – safety first! Wear appropriate safety gear, including gloves and safety glasses, to protect yourself from cuts and debris.

Post-trim tips!

  • Clean up the trimmings promptly to prevent them from smothering the base of the hedge or attracting pests.
  • You can always apply a slow-release fertilizer to help the hedge recover and promote healthy growth. Water the hedge adequately to reduce stress and aid in recovery.
  • Monitor the hedge’s growth during the autumn and winter months in case of any issues and plan for spring maintenance.

By following these tips and taking care when doing your autumnal trim, you can help ensure a healthy hedge for the coming season.


Posted on Leave a comment

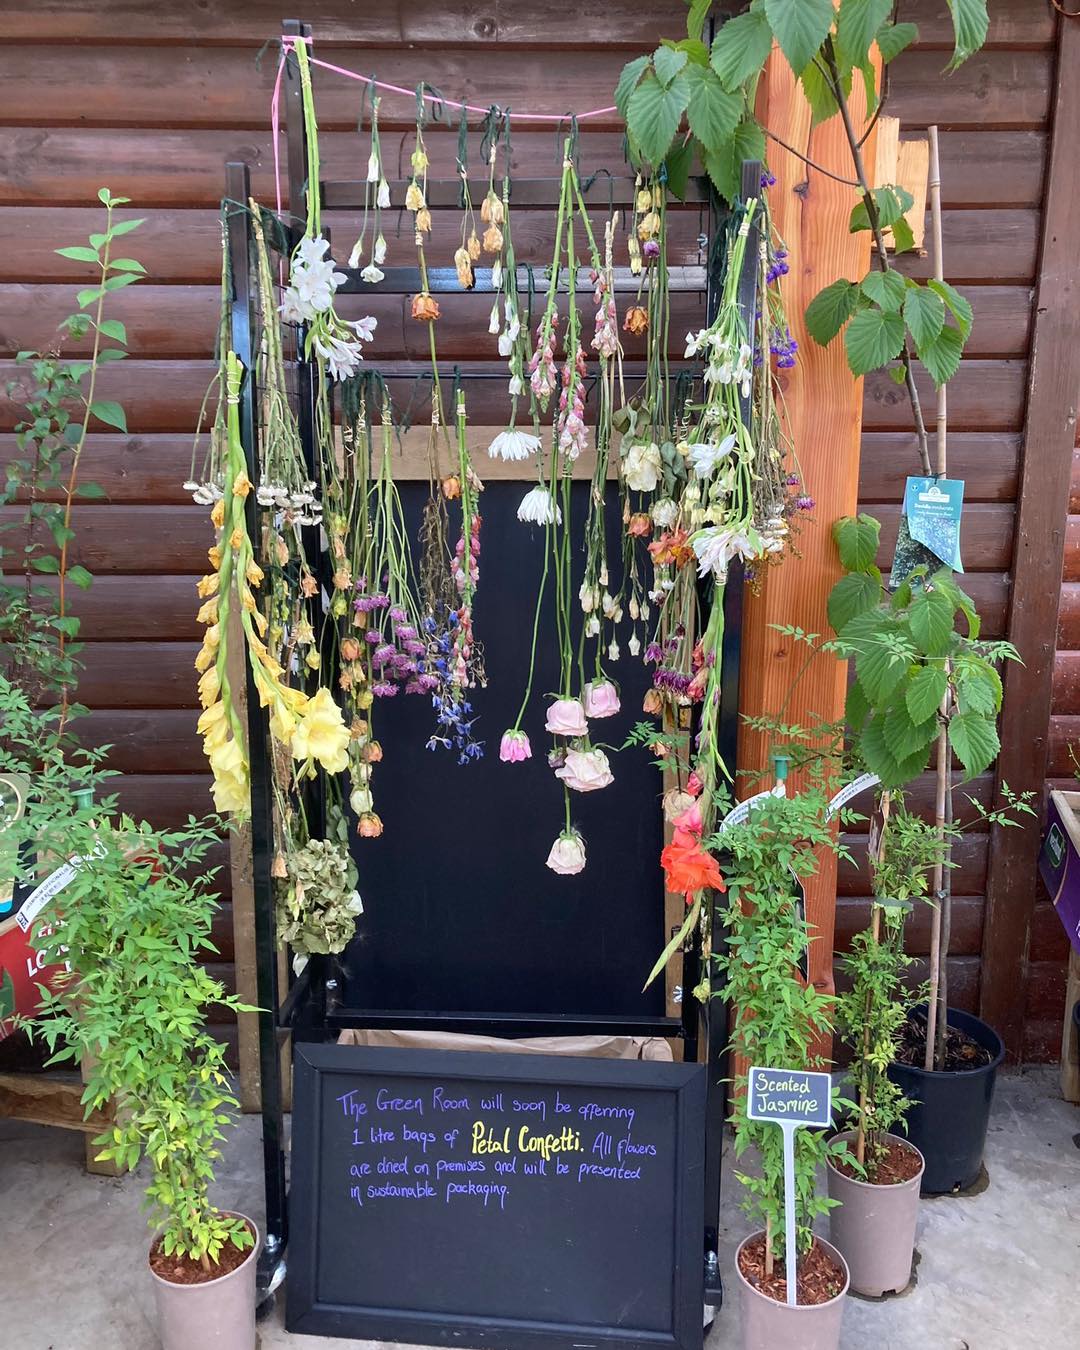
How to dry flowers

Drying flowers will preserve their beauty and extend their lifespan.

Here’s our simple guide on how to dry flowers:

Choose the right flowers – Some flowers dry better than others. Flowers with low moisture content, sturdy petals, and vibrant colours tend to dry well. Examples include roses, lavender, hydrangea and herbs like thyme and rosemary.  At this time of the year Hydrangea heads are very popular for drying. The best method is to cut the flower head and stem when the blooms start to turn crispy in texture while still retaining colour, place into a jar of water and leave to dry with stem sitting in water.

Harvest time – It’s best to harvest flowers for drying just before they reach full bloom. At this stage, they have the highest concentration of essential oils and are less likely to wilt during the drying process.

Air Drying

The general rule for most flowers is to pick when the blooms are ½ – ¾ of the way open as they will keep opening while they hang to dry. Picking them too late may cause them to go mouldy. Remove any foliage (it can go a bit yucky) and some varieties of flower may require wiring to attach the heads to the stems – otherwise the heads may flop. You can hang them upside down or you can place them in a vase or bucket, allowing the stems to arch over the container. This can add some dimension to your dried flower bouquet instead of having all straight stems in a bunch. Keep flowers out of direct sunlight when drying and displaying as this will cause the colours to fade.

Bunching – Gather the flowers into small bunches. A rubber band or string can be used to secure the stems together.

Hanging –  Hang the bunches upside down in a dark, dry, and well-ventilated space. This could be a cupboard, attic or a dry garage.

Monitor their progress – Check on the flowers regularly during the drying process. The time required for drying varies depending on the flower type, size, and drying method. Flowers are dry when they feel papery to the touch and are stiff.

Using silica gel

Colour changing silica gel crystals are ideal as you can “reset” them in the oven and use over and over. Use a little paintbrush to carefully remove all silica gel beads from in-between petals. Small grains of silica gel beads or silica sand is better to use as the larger beads can indent the petals. Always wear a mask and gloves. It can take weeks to dry some flowers, all dependent on moisture content.

Remember that not all flowers are suitable for drying, and the success of the drying process depends on factors like humidity, temperature, and the condition of the flowers you start with. Experimenting with different methods can help you find the approach that works best for the specific flowers you’re working with.


Posted on Leave a comment

Meet Mel

What attracted you to a career in floristry?

I fell into floristry by chance. A family member had bought a florist and I offered to work a few hours helping him condition flowers etc.  I had been working for my Dad in the family engineering firm, but he was winding the business down for retirement. So, what started off as a few hours a week ended up being full time and becoming shop manager. One day a new florist started and suggested I learn how to make simple bouquets up and the rest as they say is history, 10 years and counting!

What is your ideal flower arrangement?

My favourite flower arrangement or certainly one to make up is the Autumn pumpkins.  Scooping them out and filling with bright autumnal colour and some fabulous textures.

What’s the one top tip for looking after flowers?

Giving the flowers a good cut and fresh clean vase.  Also not keeping them in a warm space helps keep them.

If you hadn’t become a florist, what would you be doing?

The fact that I came into floristry in my late 30s I already had an important job alongside working for my Dad and that was a parent to my 3 kids.  However, when I was younger, I always wanted to be a nursery nurse, but life had different ideas and I became a travel agent.  Floristry is something I wish I had gotten into earlier as I do love my job.

Posted on Leave a comment

Propagating houseplants

Taking leaf cuttings is a popular method of propagating houseplants. Some houseplants are better suited for leaf cuttings than others because they readily root and grow from individual leaves. Here are a few houseplants that are well-suited for leaf cuttings:

African Violet – African violets are one of the most popular houseplants for leaf cuttings. Simply snip a healthy leaf and place its stem end into a pot with moist soil. New plants will develop at the base of the leaf.

Snake Plant – Snake plants are hardy and easy to propagate from leaf cuttings. Cut a healthy leaf into smaller sections and plant them vertically in soil. They will develop into new plants over time.

Monstera – Monstera which can be propagated via cuttings taken below a node -the bumps in the stems where new growth emerges. These are the plant tissues that have the ability to develop new roots. Without them, your cutting will simply rot.

Succulents & Jade – To propagate succulents and jade plants the best method is to place the leaf on top of compost and spray/mist it with water. You will see new growth and roots begin to show within a couple weeks. Drop any fallen leaves from succulents onto a tray of compost mixed with sand and perlite and if left to do it’s own thing, the tray will be filled within a few months. Plants like echeveria will sprout loads of new rosettes. Succulents are desert plants so soil mixed with sand and grit is best to allow drainage – they thrive on neglect so perfect for those that are afraid if killing a houseplant!

Begonia – Some begonias can be propagated from leaf cuttings. Choose healthy leaves, cut them into sections, and plant them in a pot with potting soil. Begonia’s can also be propagated from stem cuttings. Stem cuttings can be placed in a jar of water or into compost – both methods work. It can help if you dip a stem into rooting powder or rooting gel before placing into compost.

Spider Plant – Spider plants can be propagated from small plantlets that grow on the ends of their long, arching leaves. Simply detach the plantlets and pot them up.

Coleus – Coleus plants can be grown from leaf cuttings. Take a healthy leaf, remove its lower leaves, and plant the stem in soil.

When taking leaf cuttings, it’s essential to use clean, sharp scissors or pruning shears to make clean cuts. Allow the cut ends to callus before planting, as this helps prevent rotting. Additionally, provide the right conditions, including proper humidity, light, and soil, to encourage successful root development and growth from the cuttings.

As ever, pop in and see us if you have any questions!

Posted on Leave a comment

Team talk – Meet Sarah

Sarah

Sarah is one of the new recruits to the team at The Green Room. Here she’s tells us all about her love of gardening!

What attracted you to a career in horticulture?

I realised my “flow state” is when I’m outside pottering in the garden, tending to plants, propagating, sowing seeds, learning about pests, disease, beneficial insects, companion plants etc. On days off I am outside in my garden first thing in the morning with my dressing gown on and I can easily stay there until the sun goes down without realising how much time has passed!

I started studying horticulture during lockdown. I gained my HNC in Horticulture with SRUC and completed half of my HND before realising my areas of interest were not covered in the remainder of the curriculum – these are flower farming, permaculture and forest gardening. Last summer I spent time volunteering with local flower farmers, as a creative individual it opened my eyes to the possibilities when combining plants with artistic flair. I have seen and assisted in creating some truly beautiful wedding displays using locally grown flowers!

I have also volunteered with The Aquaponics Garden in Cupar while they were running plant trials growing a variety of food and flowers under LED lights – the range of Asian vegetables they grew was interesting! At the start of this year I was running my own gardening company working in The Walled Garden of Arkleton based in Langholm and now I find myself here!

What’s your ideal garden?

In an ideal world I would love a ½ acre garden where I can grow a variety of flowers, fruit, vegetables and herbs – enough to feed my family on and most, if not all would be perennials to keep gardening jobs nice and easy! Plants would be placed to mimic that of a forest garden, where I can harvest my own dinner each night with year-round offerings. I would have plenty patches of comfrey and nettles to attract the ladybirds and to use as an organic fertiliser. My pest control team would consist of ducks to keep on top of the slugs, chickens to eat the pests and to fertilise the soil and a couple doggos to keep the rabbits and deer away!

What do you plant in your outdoor space?

In my garden I’ve removed all the grass to get as many plants in as possible! I plant tomatoes, cucumbers and dahlias in my greenhouse, my garden is a mix of fruit bushes, apple trees, vegetables such as courgettes, broccoli and cabbage. I also grow a range of flowers I can use for drying like zinnia, scabious, loads of allium and I have about 8 hydrangea bushes! It’s a bit of an eclectic mix that has evolved while I’ve been learning. I just wish I had more time to spend in it.

What’s the one thing we should all be doing to be more sustainable in our gardens/outdoor spaces?

I’m a big fan of soil health. Heavy mulching with woodchip in autumn will provide your plants and soil with a slow release of nutrients throughout the year. I also grow comfrey on every bed in the garden and follow the “chop and drop” technique where you simply chop the foliage and lie it on top of the soil. Not only does this suppress the weeds, it also provides nitrogen to the soil. I’m a big believer in no-dig (should be called only dig if you need to) – laying cardboard, sheep-fleece then a 4 inch topping of compost, topped with mulch. This helps massively with suppressing weeds and with water retention, making watering a lot easier during the summer months. I learnt recently that some weeds need only a millisecond of light to germinate, it just takes one turn of the soil for it to happen! I’ve noticed a huge difference in my garden since establishing no dig beds.I could go on forever, I’ll stop now!

If you have any questions for Sarah, pop into the shop for a chat!

Posted on Leave a comment

Wasp facts

The sound of summer is often punctuated by several yelps and screams as a wasp arrives at a bbq. They are seen as a pest by many, but actually, they are exactly what you want in your garden. Here are some fun facts about these stripy insects who have a bad rep!

  • The UK has 7,000 species of wasps.
  • We love a bee as we view them as useful pollinators in our gardens. However, the poor wasp doesn’t get the same adoration, despite providing a similar pollination service!
  • Wasps are also a natural form of pest-control and are very efficient decomposers making them extremely ‘useful’ garden companions.
  • The vast majority (around 70 per cent) of wasps don’t sting
  • Gardens provide particularly good habitats for wasps, especially if there’s lots of dead wood, exposed soil, flowers, water and a healthy population of other insects.
  • Wasps are hunters, usually of other insects, because their offspring require meat to develop into adults. This makes them very efficient natural pest-controllers, including insect pests in gardens like caterpillars, aphids and weevils.
  • Wasps will find nutrition from nectar in flowers and in doing so, they carry pollen from flower to flower. Social wasps are also decomposers and so are important in gardens in clearing up dead creatures – including your leftover BBQ sausage… (unless the dog got there first!)
  • Solitary wasps won’t bother you at all – you won’t even know they are there. Social wasps only become bothersome at the end of the summer.
  • Social wasps (those that live in colonies) catch live and dead prey and bring it back to their colony to feed to developing larvae. A single queen lays the eggs, which are cared for by thousands of workers. It is the workers that do the hunting and feeding and in return, the larvae give the workers a sugar reward each time they are fed, providing the adult wasp with some nutrition. The colony produces only workers until the late summer, when the queen switches to producing sexual brood – young queens and males. Males die after mating (with new queens from other nests), along with any remaining workers and the old queen. Mated young queens hibernate and establish a new nest next spring.

To avoid a bbq incident due to waving arms and shrieks, put out some jam or other sugary treat, a few metres away from your dining area, and the wasps will be happy and stay away from you.

*Source – the Royal Entomological Society

Posted on Leave a comment

Orchid care

The orchid family is enormous! Moth orchids, also known as Phalaenopsis are the easiest to grow and their flowers last for many week. Here are some tips on keeping your orchid happy and healthy;

Provide adequate lighting

Moth orchids thrive in bright, indirect light. Place them near a window with filtered sunlight, but avoid exposing them to direct, harsh sunlight, as it can burn the leaves.

Maintain proper temperature and humidity

Moth orchids prefer temperatures between 65-80°F (18-27°C) during the day and slightly cooler temperatures at night. Additionally, they appreciate moderate humidity levels, so consider using a humidifier or placing the pot on a tray with water and pebbles.

Water correctly

Overwatering is a common cause of orchid demise. Water your moth orchid only when the top inch of the potting medium feels dry to the touch. Use room temperature water and ensure that excess water drains out completely. Avoid leaving the orchid sitting in standing water, as it can lead to root rot. You can water by dipping and draining. Do this about once a week in spring and summer and every couple of weeks in winter.

Choose a suitable pot

Orchids require proper drainage, so select a pot with drainage holes. Moth orchids typically thrive in a well-draining orchid bark mix or sphagnum moss. Avoid using regular potting soil, as it retains too much moisture.

Feed judiciously

Moth orchids benefit from regular feeding, but it’s important not to overdo it. Use a balanced orchid fertiliser. Generally, fertilise once a month during spring and summer and every couple of months in winter.

Prune carefully

If any leaves, stems, or roots on your orchid are dead, yellowing, or diseased, it’s best to trim them off.

Prevent pest infestations

Monitor your orchid for signs of pests like aphids, mealybugs, or scale insects. If you notice any infestation, address it promptly using appropriate insecticides or natural pest control methods.

Avoid sudden temperature changes

Orchids are sensitive to extreme temperature fluctuations. Keep them away from drafts, vents, and areas with rapid temperature changes, such as near heating or cooling appliances.

Repot when necessary

As your orchid grows, it may outgrow its pot. Repotting should be done when the orchid is not blooming. Use fresh potting medium, and be gentle with the roots during the process.