Posted on Leave a comment

Protect your plants from frost

Last year December’s cold snap was devastating for a lot of plants. The heavy rainfall in November followed by a cold snap in December meant that our borderline hardy evergreens were hit hard.

With temperatures now falling, and dipping below zero across Scotland, it’s important to protect plants that hail originally from warmer climes. They need to be moved under cover, into a cold frame, conservatory, mini greenhouse, porch, shed or greenhouse, or given some protection outdoors.

Which plants should you protect from a cold snap?

The plants you need to protect (to name a few) include;

  • Rosemary
  • Phormium
  • Cordyline
  • Lavendar
  • Ceanothus
  • Cistus
  • Camellia

If you’re in doubt, come and ask us, we can advise on any plants that may need protected.

What to do now

It’s important to mulch, fleece and wrap your susceptible plants and pots as soon as cold weather is forecast.  Bring tender plants inside into conservatories, greenhouses, or homes.

Repair greenhouses, mending cracks and gaps. Use fleece and recycled bubble wrap to fend off cold. This also helps to keep plants dry.

Gather frost prone produce i.e. beetroot, celeriac, and scabbage – and store under cover. You can leave carrots in the ground but cover them with cardboard as they taste best if left in the soil. It is worth covering winter leeks and parsnips so that some can be lifted even in a bad frost.

Give evergreen branches a shake after snowfall, as they can snap if weighed down too heavily. Deciduous plants aren’t so much at risk of damage as without their leaves the snow will fall straight through.

Watch your wildlife

By leaving vegetation for as long as possible before clearing it, gives wildlife a chance and provides shelter for insects and food for birds.

Top up bird feeders and position bird boxes to shelter birds and enable them to identify nesting sites in good time.

If it’s cold enough that you think your pond may freeze, pop a floating ball in it.

As ever, if you’ve any questions please do come and talk to us, we’re happy to help!

Posted on Leave a comment

Improve soil health

Improving the health of your soil is essential for successful gardening. Healthy soil provides the necessary nutrients, water retention, and structure for plants to thrive.

So how do we do this? Here are our tips to make your soil healthier:

Test Your Soil

Start by getting your soil tested to understand its pH and nutrient levels. You can use a soil testing kit (we have them in stock!) If your soil’s pH is too high or too low for your desired plants, consider adjusting it by adding lime (to raise pH) or sulphur (to lower pH) following soil test recommendations.

Feed it!

Add compost to your soil to increase its organic matter content. Compost improves soil structure, water retention, and nutrient availability. You can always make your own compost as well.

You can also use organic mulch. You can create this from fallen leaves and raw veg peelings. It’s great for the environment due to the reduction in waste as well as using the seasonal leaf fall. It will protect it from erosion, regulate temperature, and improve moisture retention.

Alternatively, choose organic or slow-release fertilizers that promote soil health. These options release nutrients gradually and encourage microbial activity.

Rotate Crops

If you’re growing vegetables or other annual plants, crop rotation can help prevent the buildup of diseases and pests associated with specific plant families.

Promote Biodiversity

Encourage a diverse ecosystem in your garden or landscape to support beneficial insects, worms, and other soil organisms that contribute to soil health.

Avoid Using Harmful Chemicals

Limit or eliminate the use of synthetic pesticides and herbicides that can harm beneficial organisms and disrupt the soil’s natural balance.

It’s all about learning from experience! Gardening and soil health are continuous learning experiences. Keep notes to see how your soil responds to different practices.

By following these practices and adapting them to your specific garden you can improve the health of your soil, leading to healthier, more productive plants.


Posted on Leave a comment

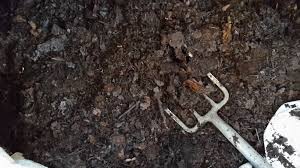
Make your own compost

Making your own compost is a great way to recycle organic waste, enrich your garden soil, and reduce the need for chemical fertilizers. Compost is created through the decomposition of organic materials, such as kitchen scraps and garden waste. Here’s how to make your own compost:

Materials You’ll Need

  • Compost bin or pile: You can use a designated bin, a pile in your garden, or even a tumbler-style composter.
  • Organic materials: Collect a mix of brown (carbon-rich) and green (nitrogen-rich) materials.
  • Brown materials include dried leaves, straw, cardboard, and newspaper.
  • Green materials include kitchen scraps (fruit and vegetable peels, coffee grounds, etc.), grass clippings, and plant trimmings.
  • Water: Compost needs moisture to decompose properly, so you may need to water it occasionally.

Steps to Make Compost

  • Select a suitable location for your compost bin or pile. It should be well-drained and receive partial sunlight.
  • Composting is all about balance. Layer brown and green materials in your bin or pile. A good rule of thumb is to use a 3:1 ratio of brown to green materials. Start with a layer of brown materials, followed by a layer of green materials.
  • Regularly turn or mix the compost with a pitchfork or a compost aerator. This helps introduce oxygen into the pile, speeding up decomposition.
  • Keep the compost moist but not soggy, similar to a wrung-out sponge. Water it if it becomes too dry or cover it during heavy rains to prevent it from getting too wet.
  • Chop or shred larger materials, like branches, to speed up decomposition.
  • Composting is a natural process, and it takes time. Depending on your composting method and conditions, it can take several months to a year for the compost to fully mature.
  • When the compost is dark, crumbly, and earthy-smelling, it’s ready to use in your garden. This can take anywhere from a few months to a year or more.

What to Compost

  • Brown materials (carbon-rich):
  • Leaves
  • Straw
  • Cardboard (shredded)
  • Newspaper (shredded)
  • Sawdust (in moderation)
  • Green materials (nitrogen-rich):
  • Fruit and vegetable scraps
  • Coffee grounds
  • Grass clippings (in moderation)
  • Plant trimmings
  • Eggshells

What NOT to Compost

  • Meat and dairy products (they can attract pests)
  • Diseased plants
  • Pet waste (it can contain harmful pathogens)
  • Weeds with mature seeds (they can survive composting)

By following these steps and maintaining the right balance of materials, moisture, and aeration, you can create nutrient-rich compost to improve your garden soil. Composting not only reduces waste but also helps you grow healthier plants.


Posted on Leave a comment

Meet Stan

What inspired you to become involved in horticulture?

It was my mother that really got me into it. My siblings and I spent a lot of time outside on riverbanks, in woods and climbing trees. I was the geeky child who could tell you what a tree was by the shape of it, even in winter! I had a sink that I kept frogs and toads in too. I went on to do Agriculture at University then got my first job at Beechgrove and it all grew from there.

What have been the highlights for you over your career?

Highlights for me are really based around seeing other people get enjoyment from plants and nature. Greens space makes such a difference to peoples lives. Plants and flowers can evoke memories and make people light up. One of my particular memories is a visit to Cornton Vale prison. I saw firsthand, the joy and pride that the garden there brought to female prisoners who had little hope. But outside, in nature, they found a sense of pleasure and purpose.

Most recently, being awarded the Pearson Memorial Medal for services to horticulture, was such a proud moment. I was quite, and still am, quite overwhelmed!

Top tips for sustainability?

Don’t try to do too much! Start small. And work with nature, not against it. Once you understand your outdoor space and what it needs you can work more sustainably.

What’s your vision for the Scottish horticulture?

To embrace the challenge of reducing our carbon footprint. Lets pick up where we left off 100 years ago and get back to local growth and supply while working within the confines of our climate.  I’d like to see a robust future for employment within horticulture across Scotland and beyond.

Posted on Leave a comment

Looking after houseplants in winter

With the setting back of the clocks, the colder, darker days are beginning to set in. But with the proper care and attention, you can ensure your houseplants thrive even as daylight becomes scarcer.

The Horticultural Trades Association (HTA) and Tropical Plants UK have shared their top tips for caring for your houseplants during the winter months.

Watering: less is more

When it comes to watering your houseplants, ‘less is more’ is a good rule of thumb at any time, and even more so in the last few months of the year, when overwatering can easily lead to root rot and other issues. Plants take up as much oxygen by their roots as they do by their leaves, but the shorter days naturally mean a reduction in the amount of light available to them. Giving your houseplant a moderate amount of water and allowing its compost to dry between waterings will promote root growth, which can be affected by the dark winter days.

Make your water wetter

In most cases your plant will tell you when it needs water – it may go from a vibrant green to a green-grey colour, or start to wither, or the stem might tilt in one direction. Just a small amount of tepid water – that’s ideally been boiled and then allowed to cool to about 20 degrees Celsius – should restore your houseplant to full health. And adding just one or two drops of washing up liquid will make your water ‘wetter’ and mean you need only use about half the amount.

Floral compass

You might be able to put your plant near a window and hope for the best during the summer months, but in winter, it’s not so simple. You should be led by the direction of your windows: south-facing windows attract the most light and heat all year round, while those that are north-facing see the least amount of light. East- and west-facing windows fall somewhere in between, with those facing west producing slightly more light.

More often than not, when a plant loses its leaves during the winter, it’s because of a lack of light. Even those that enjoy some shade during brighter months – like a Monstera Deliciosa (also known as a Swiss cheese plant) or a Ficus – should be moved to south-facing windows in the winter.

Winter winners

If you’re thinking about adopting a new houseplant and wondering which types fare well in the winter, look no further than the tropical jungle. Dracaenas, Epipremnums (commonly known as Devil’s Ivy or Pothos), and Philodendrons are resilient all year round, but they especially thrive in the winter. That may seem strange, but it’s because they’re adept at surviving in very low light levels, with about 95% of sunlight being filtered out by the time it gets to the dark forest floor.

Contrary to popular belief, poinsettias – a flower synonymous with Christmas – require a lot of discipline to succeed in winter. They need as much light as they can possibly get during the daytime – preferably from a south-facing window – followed by 12-13 hours of darkness, continuously for a period of about 8 weeks, to achieve their iconic vivid red colour. Moving your poinsettia from the window to the table to use it as a centrepiece in the evenings could be an easy solution to this – just remember to put it back at its window the next morning.

Living feature

Placing your houseplant in a lightbox or under a spotlight could have the dual effect of exposing it to more light, while also making it a living feature in your home. During the festive period, adorn your houseplant with fairy lights and baubles for a less expensive, more sustainable alternative to a Christmas tree. Ficus Benjamina, Palms and Yuccas, which can grow up to six feet tall, are the perfect candidates for this.

*With thanks to the HTA 


Posted on Leave a comment

Pumpkin pointers!

It is the perfect time of year to enjoy your pumpkin and/or squash crop.  Halloween means creating brilliant pumpkin designs but it’s important to remember that pumpkins are a great food source. And they taste even better if you’ve grown them yourself.

A recent study showed that waste from Halloween celebrations included eight million pumpkins which became food waste.

So how to get the best out of your pumpkin? As long as you haven’t painted your pumpkin, you can reuse it. However, remember that while most pumpkins are edible to both animals and humans, double check  that you have an edible pumpkin before you cook it.

Everything from inside your pumpkin can be recycled or used. Pumpkin innards, the stringy orange mess can be roasted, or pureed for cooking in soups.

When you’re scooping out the innards, save the seeds as they’re a brilliant snack for human or birds and squirrels.

The team here love a roasted pumpkin seed! Just follow the steps below for a tasty treat;

  • Pull out all the pumpkin innards and then to separate the stringy pumpkin innards from the seeds themselves.
  • Rinse the seeds thoroughly and spread them over a large baking tray.
  • Choose what you want to flavour your pumpkin seeds with, you could opt for paprika, sea salt, chilli flakes. Cover the seeds in your flavour and in a few glugs of olive oil.
  • Bake them at 180 degrees C for about ten minutes.
  • Voila! Tasty seeds for salads or sprinkled on soups!

Can I plant the pumpkin seeds?

Yes you can! A brilliant way to grow your own is to plant the seeds from this year.

Remove the seeds from the pumpkin, make sure they are dry and clean. Spread them out on a piece of paper towel and then leave them to dry in a cool dry area. Then they’re ready for planting.

Planting pumpkin seeds is usually done a month before the last frost in the new year, so that your crop is ready for late summer/autumn time, although you can still plant pumpkin seeds as late as May.

After Halloween (as long as they’re not painted), you can leave the pumpkin outside to feed the birds. Or pop it onto the compost heap.

Recipe inspiration

It’s definitely the time of year to be making soup! One of our favourites is a Thai pumpkin soup;

Ingredients

  • 5kg pumpkin (or squash), peeled and roughly chopped
  • 4 tsp sunflower oil
  • 1 onion, chopped
  • 1 tbsp grated ginger
  • 1 lemongrass, bashed a little
  • 3-4 tbsp Thai red curry paste
  • 400ml can coconut milk
  • 850ml vegetable stock
  • Lime juice and sugar, for seasoning
  • 1 red chilli sliced, to serve (optional)

STEP 1

Heat oven to 200C/180C fan/gas 6. Toss the pumpkin or squash in a roasting tin with half the oil and seasoning, then roast for 30 mins until golden and tender.

STEP 2

While the pumpkin is roasting, put the remaining oil in a pan with the onion, ginger and lemongrass. Gently cook for 8-10 mins until softened. Stir in the curry paste for 1 min, followed by the roasted pumpkin, all but 3 tbsp of the coconut milk and the stock. Bring to a simmer, cook for 5 mins, then fish out the lemongrass. Cool for a few mins, then whizz until smooth with a hand blender, or in a large blender in batches. Return to the pan to heat through, seasoning with salt, pepper, lime juice and sugar, if it needs it. Serve drizzled with the remaining coconut milk and scattered with chilli.

Enjoy!


Posted on Leave a comment

Protect your tender plants

There’s definitely been a drop in temperature these last few days and it reminds us that winter is on the way. Autumn can be very mixed, but a sudden cold snap can create havoc on your tender plants. Tender plants are often plants that come from warmer climes aren’t used to frost and will likely die off if not protected.  It’s important to keep an eye on the forecast, especially frost, and take appropriate measures to protect your plants accordingly. If you’re not sure if a plant is hardy, check its country of origin and that will give you a clear idea.

Many of us have big containers of tender plants sitting outside during the winter so make sure you cover these with a horticultural fleece to protect them. Don’t put a plastic bag over them as the plastic can hold on to the moisture and doesn’t let the air flow round them. This creates a fungi that will finish them off! You can cover terracotta and ceramic pots with bubble wrap as this will ensure they don’t fracture in the cold. But try to move pots closer to the house to shelter them.

Ideally, you should overwinter plants indoors, in a frost-free greenhouse or frame.

  • The plants will still need watered but keep it to a minimum. Too much water will make the roots soggy and start to rot.
  • If you see any pests, you’ll need to eliminate them as soon as possible!
  • Remove any faded leaves and cut off any dying stems.
  • Don’t worry about feeding the plants during the winter as they can use the nutrients at this time of year.
  • Make sure there is good air circulation round them.
  • Keep an eye on the temperature – you need to make sure night temperature is high enough to deal with any frosts.

We have a few tender favourites amongst the team that can be overwintered;

Osteospermums – these bright border daisies will cope with a mild winter but it’s safer to overwinter. Just op the cuttings in modular trays in the greenhouse.

Fuchsias – there two types of fuchsia – the hardy and the not so hardy! If you have a tender fuchsia, cut it back, pot it up and place in the greenhouse. You can then take cuttings in early spring which can be planted in May when there is little chance of frost. (Although in Scotland you never know!)

Dahlias – a particular favourite of our colleague Colin.  You can dig up the tubers after the first frost to store until the spring or you can overwinter them outside under a thick layer of compost mulch. Come late winter, you can poot up tubers and take cuttings from the shoots that emerge.

If you have any questions, please do get in touch, we’d be delighted to help!

Posted on Leave a comment

Trimming tips

It’s that time of year to be trimming hedges in order to keep them tidy and healthy. It’s important to get them cut before the first hard frost as this will allow them to recover before winter sets in. We’ve pulled together some tips from the team to help trim well!

First things first, have you got the right tools to trim? Depending on the type of hedge, you’ll need sharp hedge shears or an electric hedge trimmer. A hand pruner may also be useful for smaller branches.

Before you start trimming, take the time to check the hedge’s condition and shape. Identify areas that need more attention and decide on the desired shape you want to achieve. Trim the hedge in a slightly tapered shape, with the top narrower than the base. This shape allows sunlight to reach the lower branches, promoting even growth.

Once you’ve assessed the hedge, remove dead or diseased growth. Cut these back to healthy growth to encourage new growth in the spring.

While trimming, avoid cutting too much at once, especially if the hedge has grown significantly. Overly severe cuts can stress the plants and affect their health. You want to aim for a natural and slightly rounded or flat top, depending on the hedge’s type and how you want it to look.

Remember – safety first! Wear appropriate safety gear, including gloves and safety glasses, to protect yourself from cuts and debris.

Post-trim tips!

  • Clean up the trimmings promptly to prevent them from smothering the base of the hedge or attracting pests.
  • You can always apply a slow-release fertilizer to help the hedge recover and promote healthy growth. Water the hedge adequately to reduce stress and aid in recovery.
  • Monitor the hedge’s growth during the autumn and winter months in case of any issues and plan for spring maintenance.

By following these tips and taking care when doing your autumnal trim, you can help ensure a healthy hedge for the coming season.


Posted on Leave a comment

How to dry flowers

Drying flowers will preserve their beauty and extend their lifespan.

Here’s our simple guide on how to dry flowers:

Choose the right flowers – Some flowers dry better than others. Flowers with low moisture content, sturdy petals, and vibrant colours tend to dry well. Examples include roses, lavender, hydrangea and herbs like thyme and rosemary.  At this time of the year Hydrangea heads are very popular for drying. The best method is to cut the flower head and stem when the blooms start to turn crispy in texture while still retaining colour, place into a jar of water and leave to dry with stem sitting in water.

Harvest time – It’s best to harvest flowers for drying just before they reach full bloom. At this stage, they have the highest concentration of essential oils and are less likely to wilt during the drying process.

Air Drying

The general rule for most flowers is to pick when the blooms are ½ – ¾ of the way open as they will keep opening while they hang to dry. Picking them too late may cause them to go mouldy. Remove any foliage (it can go a bit yucky) and some varieties of flower may require wiring to attach the heads to the stems – otherwise the heads may flop. You can hang them upside down or you can place them in a vase or bucket, allowing the stems to arch over the container. This can add some dimension to your dried flower bouquet instead of having all straight stems in a bunch. Keep flowers out of direct sunlight when drying and displaying as this will cause the colours to fade.

Bunching – Gather the flowers into small bunches. A rubber band or string can be used to secure the stems together.

Hanging –  Hang the bunches upside down in a dark, dry, and well-ventilated space. This could be a cupboard, attic or a dry garage.

Monitor their progress – Check on the flowers regularly during the drying process. The time required for drying varies depending on the flower type, size, and drying method. Flowers are dry when they feel papery to the touch and are stiff.

Using silica gel

Colour changing silica gel crystals are ideal as you can “reset” them in the oven and use over and over. Use a little paintbrush to carefully remove all silica gel beads from in-between petals. Small grains of silica gel beads or silica sand is better to use as the larger beads can indent the petals. Always wear a mask and gloves. It can take weeks to dry some flowers, all dependent on moisture content.

Remember that not all flowers are suitable for drying, and the success of the drying process depends on factors like humidity, temperature, and the condition of the flowers you start with. Experimenting with different methods can help you find the approach that works best for the specific flowers you’re working with.


Posted on Leave a comment

Meet Mel

What attracted you to a career in floristry?

I fell into floristry by chance. A family member had bought a florist and I offered to work a few hours helping him condition flowers etc.  I had been working for my Dad in the family engineering firm, but he was winding the business down for retirement. So, what started off as a few hours a week ended up being full time and becoming shop manager. One day a new florist started and suggested I learn how to make simple bouquets up and the rest as they say is history, 10 years and counting!

What is your ideal flower arrangement?

My favourite flower arrangement or certainly one to make up is the Autumn pumpkins.  Scooping them out and filling with bright autumnal colour and some fabulous textures.

What’s the one top tip for looking after flowers?

Giving the flowers a good cut and fresh clean vase.  Also not keeping them in a warm space helps keep them.

If you hadn’t become a florist, what would you be doing?

The fact that I came into floristry in my late 30s I already had an important job alongside working for my Dad and that was a parent to my 3 kids.  However, when I was younger, I always wanted to be a nursery nurse, but life had different ideas and I became a travel agent.  Floristry is something I wish I had gotten into earlier as I do love my job.