Posted on Leave a comment

Caring for dahlias

dahlias

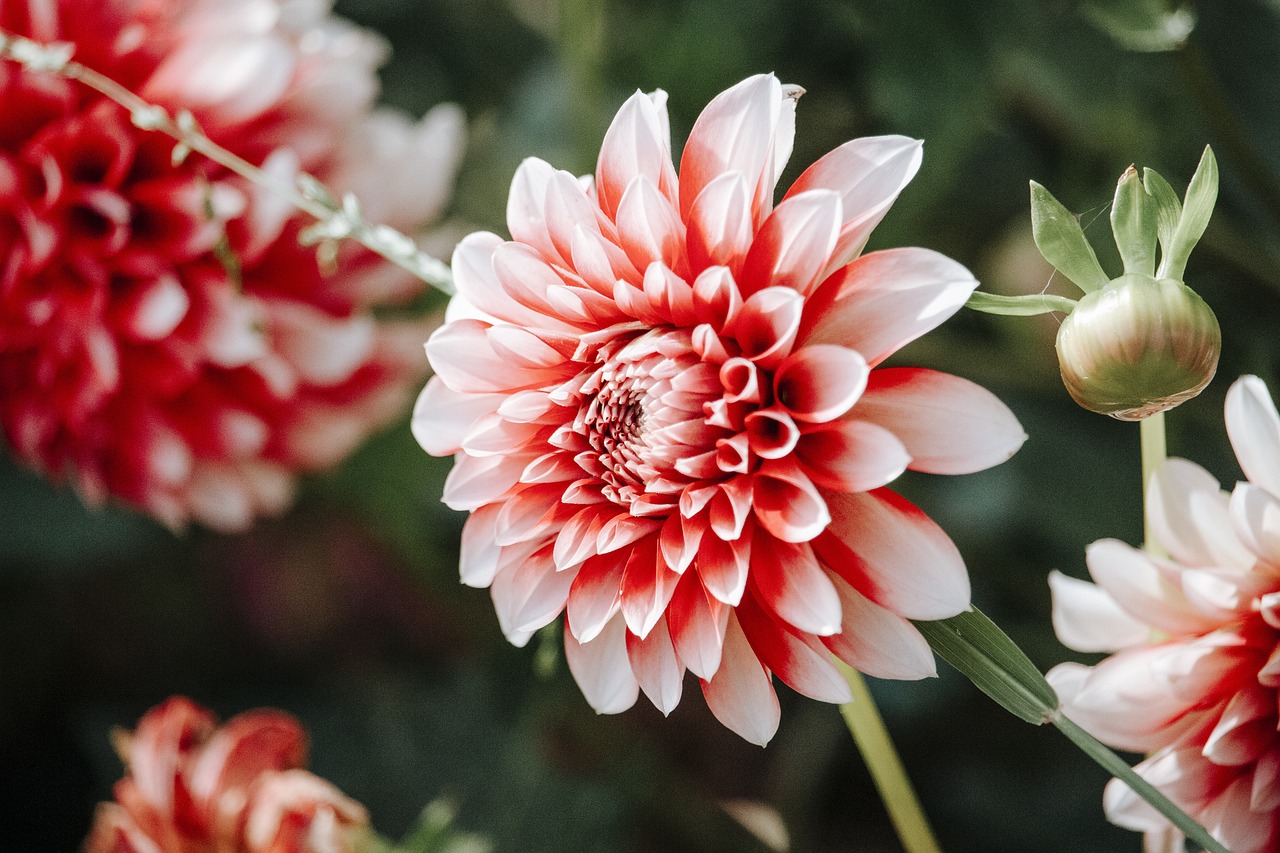
Caring for dahlias once they are flowering means giving them love and attention (!) and if you want them to flower the following year, then follow our guide;

Pruning and Deadheading

  • Pinching: When the plants are about 12 inches tall, pinch out the top growth to encourage bushier growth and more flowers.
  • Deadheading: Regularly remove spent flowers to encourage continuous blooming and prevent the plant from going to seed.

Pest and Disease Management

  • Slugs and Snails: Protect young plants from these pests by using barriers or organic slug pellets.
  • Powdery Mildew: Ensure good air circulation and avoid overhead watering to reduce the risk of this fungal disease.

End of Season Care

  • Frost Protection: In colder climates, dahlia tubers must be dug up and stored after the first frost.
  • Digging Up Tubers: Cut back the foliage after the first frost blackens it, then carefully dig up the tubers.
  • Storing Tubers: Allow tubers to dry for a few days, then store them in a cool, dry place (40-50°F) in peat moss, sawdust, or sand. Check them periodically for signs of rot.

Propagation

  • Dividing Tubers: In spring, before planting, divide tubers with at least one eye each to propagate more plants.
  • Cuttings: You can also take cuttings from new shoots in spring to start new plants.

Winter Care (if not lifting tubers)

  • Mulching: In mild climates, you can leave tubers in the ground over winter but this is Scotland (!) so mulch heavily to protect them from frost.
Posted on Leave a comment

Green Tomato Chutney

Perfect to maximise your harvest and make it last all  year.

Ingredients

  • 2½ kg green tomatoes
  • 500g onion
  • 1 rounded tbsp salt
  • 500g sultanas
  • 500g cooking apples
  • 500g light muscovado sugar
  • 1.14l jar spiced pickling vinegar
Method
  • STEP 1

    Slice the tomatoes (you can skin them if you want, but it’s not necessary). Finely chop the onions. Layer both in a large bowl with the salt. Leave overnight.

  • STEP 2

    The next day, chop the sultanas using a large, sharp knife, then peel, core and chop the apples. Put the sugar and vinegar into a large pan and bring to the boil, stirring to dissolve the sugar. Add the sultanas and apples and simmer for 10 mins. Strain the tomatoes and onions in a colander (but don’t rinse), then tip into the pan and return to the boil.

  • STEP 3

    Simmer for about 1 hr, stirring occasionally until the mixture is thick and pulpy. Transfer to warmed jars. You can use old jam jars for chutney as long as the inside of the lids are plastic coated, otherwise the vinegar will corrode the metal. Or you can use kilner jars. To sterilise, wash the jars in very hot water and leave to drain. When they are dry, put them in the oven at 160C/140C fan/gas 4 for 10 mins before using.

Posted on Leave a comment

SAGE RECIPE – GRUYÈRE, PROSCIUTTO & SAGE TOASTIE

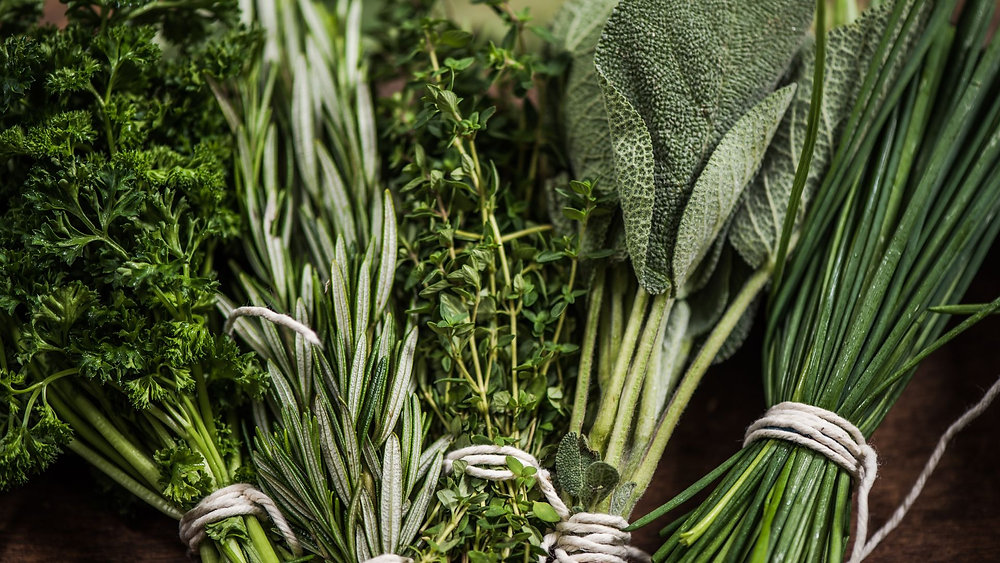
We love finding different way to use our herbs. This toastie is cracking, give it a go!  

INGREDIENTS

  • 2 slices of bread
  • wholegrain mustard
  • 50g grated gruyère
  • 2 slices of prosciutto
  • 2 finely chopped sage leaves
  • butter

Spread both slices of bread with the mustard. Top one slice with the cheese and prosciutto. Sprinkle the sage leaves over the other slice, then sandwich together. Butter the outsides and cook in a hot frying pan, weighed down by another heavy pan, for 2-3 mins on each side until the outside is crisp and the cheese has melted. Alternatively, cook in a sandwich toaster.

Posted on Leave a comment

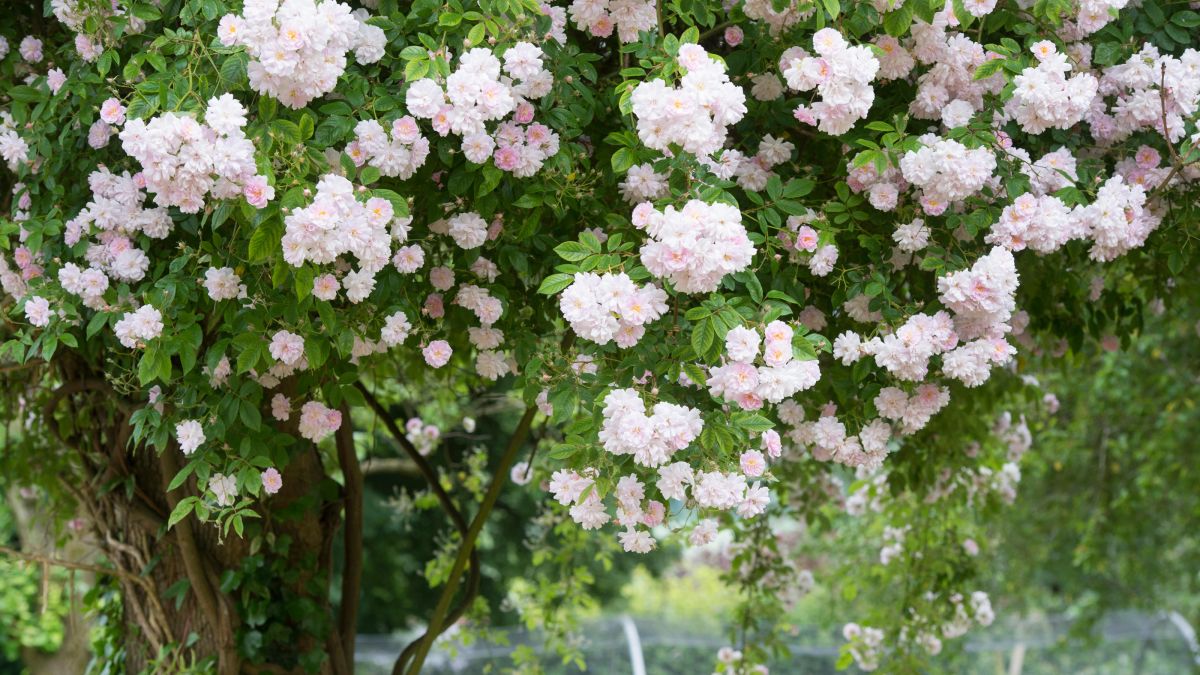
Caring for roses

Caring for roses involves several essential steps to ensure they thrive and produce abundant, beautiful blooms. Here’s our guide to keeping your garden rosy;

Planting – Choose a site with at least 6 hours of direct sunlight daily. Morning sun is ideal to dry off dew and prevent fungal diseases.

Soil – Plant roses in well-draining soil rich in organic matter. Amend soil with compost or aged manure to improve fertility and drainage.

Spacing – Provide adequate space between plants (typically 2-3 feet) to ensure good air circulation, which helps prevent disease.

Watering – Water roses deeply but infrequently, aiming for about 1-2 inches per week. Water at the base of the plant to keep the foliage dry and prevent disease.

Mulching – Apply a 2-3 inch layer of mulch around the base of the plant to retain moisture, suppress weeds, and regulate soil temperature.

Feeding – Feed roses with a balanced rose fertilizer or a slow-release formula. Apply fertilizer in early spring when new growth begins and again after the first bloom cycle. We have some great  organic fertilisers such as fish emulsion and bone meal for a natural nutrient boost.

Pruning – Prune roses in early spring (just as buds begin to swell) to remove dead or damaged wood, shape the plant, and encourage new growth. Make cuts at a 45-degree angle about 1/4 inch above an outward-facing bud.

Deadheading – Remove spent flowers throughout the blooming season to encourage continuous blooming and improve the plant’s appearance.

Pest and Disease Control – Watch for common pests such as aphids and spider mites. If you see any pesky pests you can try to introduce beneficial insects like ladybirds for control.

Diseases – Prevent fungal diseases like black spot and powdery mildew by ensuring good air circulation, watering at the base, and using fungicidal sprays if needed. Remove and dispose of any infected leaves.

Winter Protection

In colder seasons, protect roses from winter damage. Mound soil or mulch around the base of the plant to insulate the roots. For climbing roses, tie canes to supports and cover them with burlap or horticultural fleece.

It’s a good idea to buy some stakes when you buy your roses as they provide support for climbing or tall rose varieties.

Hopefully with the right care, your roses will be healthy and ready to produce beautiful blooms year after year.


Posted on Leave a comment

Meet Marie

As the newest member of the Green Room team, we were keen to find out a bit more about Marie.

What attracted you to a career in horticulture?

  • I decided I wanted a more relaxed environment to work in and I love being outdoors.  I’ve always enjoyed gardening where ever I’ve lived and currently have an allotment that I’m in when ever I get a free minute. I love seeing things grow and love trying to grow a range of things.

What is your ideal flower arrangement/favourite plant?

  • I love peony or but I’m a stickler for tradition so I’d also have to say a snowdrop. The first sign of warmer weather coming!

What’s the one top tip for looking after your flowers and/or your outdoor space?

  • Try planting or growing whatever you fancy and enjoy gaining the knowledge that comes with it. You’ll have successes and failures but that’s all part of gardening and trying new things.

If you weren’t doing what you are, what would you be doing job-wise?

  • I’d probably be studying fulltime for my HNC in horticulture. But I’m actually really fortunate to have the best of both worlds in that I can study part-time and work part-time which gives me lots of experience and knowledge to put into practice.
Posted on Leave a comment

Repotting your houseplants

Repotting houseplants is an essential part of plant care, helping to ensure they have enough space, fresh soil, and nutrients to thrive. Here’s how:

Choose the right time

The best time to repot most houseplants is during their active growing season, typically spring or early summer.

Choose the right pot

Choose a pot that is 1-2 inches larger in diameter than the current pot. Ensure it has drainage holes to prevent waterlogging.

Prepare the plant

Water the plant a day before repotting. This helps to loosen the roots and makes the process easier.

Remove the plant from its current pot

Gently turn the pot sideways and tap the bottom to release the plant. You may need to squeeze the pot slightly if it’s made of plastic. If the plant is root-bound (roots circling the pot), you might have to carefully cut the pot away.

Examine and trim the roots

Inspect the roots for any signs of rot or disease. Healthy roots are usually white or light brown. Trim away any dead or unhealthy roots using clean scissors or pruning shears.

Loosen the rootball

Gently tease apart the roots, especially if they are circling tightly. This encourages them to spread out into the new soil.

Prepare the new pot

Add a layer of fresh potting soil to the bottom of the new pot. This provides a base for the plant.

Place the plant in its new pot

Position the plant in the centre of the new pot. Ensure the top of the root ball is about an inch below the rim of the pot.

Add fresh soil

Fill in around the plant with fresh potting soil, pressing it down gently to eliminate air pockets. Make sure the plant is standing upright and at the same soil level as it was in the old pot.

Water it

Water the plant thoroughly to help settle the soil. Ensure water drains out of the bottom to confirm proper drainage. If the soil settles significantly after watering, add a bit more soil to top it off, but avoid covering the plant’s stem.

After repotting

Place the plant in a suitable location with the right amount of light. Avoid direct sunlight for a few days to reduce stress. Continue with your regular watering and care routine, but be mindful not to overwater immediately after repotting.

Top Tips

  • Use quality potting mix: Different plants may require specific types of soil (e.g., cactus mix for succulents, orchid bark for orchids).
  • Handle with care – Be gentle with the roots and foliage to avoid damaging the plant.
  • Clean tools and pots – Sterilize tools and clean pots before use to prevent disease.
  • Repotting can be a bit messy, so it’s a good idea to do it outside or cover your work area with newspapers or a plastic sheet.

Then watch your plant bloom in its new home!

Posted on Leave a comment

How to grow herbaceous perennials

It’s the season to be planting herbaceous perennials – think delphiniums, ground cover clematis and iris. These glorious plants will give you great colour and interest in your outdoor space. Here are a few tips to make sure you get the best out of them. It’s important to select plants that are suitable for your soil type and garden conditions. Think about where you want to plant them and consider factors like sunlight exposure, moisture levels, and space available. Once you have decided, then it’s time to get planting!

Soil Preparation

  • Test your soil to determine its pH and nutrient levels.
  • If need be, use compost to get the right type of soil
  • Ensure you have good drainage to prevent waterlogging

Planting

  • Spring is a great time to plant them as the soil is manageable and temperatures are warmer
  • Dig a hole slightly larger than the plant’s root ball and place it at the same depth as it was in the container
  • Space plants according to their mature size and remember to take into account their spread!

Watering

  • Keep the soil consistently moist but not waterlogged, especially as the plant is initially bedding in
  • Water deeply and infrequently to encourage deep root growth.
  • Mulch around the base of plants to retain soil moisture and suppress weeds

Maintaining healthy growth

  • Regularly monitor plants for signs of stress, pests, or diseases
  • Deadhead spent flowers to encourage continuous blooming and prevent self-seeding
  • Divide overcrowded perennials every few years to maintain healthy growth and prevent them from becoming too congested

Feeding

  • Apply a balanced, slow-release fertilizer in spring to promote healthy growth
  • Avoid over-feeding, as excessive nutrients can lead to lush foliage but fewer flowers

Winter Care

  • Mulch around the base of plants in late autumn to protect them from freezing temperatures
  • Cut back dead foliage in late autumn or early spring to tidy up the garden and prevent disease

Support

  • Lots of herbaceous perennials can grow very tall. Make sure you have stakes or cages for tall or to prevent them from bending or breaking under their own weight

Enjoy the benefits of your labour!

  • Sit back and enjoy the beauty of your garden throughout the growing season and take time to observe pollinators and other wildlife that are attracted to your garden.
Posted on Leave a comment

Planting acid-loving shrubs

Planting acid-loving shrubs in pots isn’t much different from planting them in the ground, but it requires a bit more attention to soil acidity and container drainage. Here’s how;

Choose the Right Shrubs

Select acid-loving shrubs suitable for container growth – think azaleas, rhododendrons, blueberries, camellias, and gardenias.

Select the Right Containers

Use large, sturdy containers with drainage holes at the bottom. The pots should be big enough to accommodate the mature size of the shrub and allow for proper root growth. (and if you don’t have the right pot, we have plenty to choose from!)

Prepare the Potting Mix

Acid-loving plants thrive in acidic soil. Use ericaeceous compost which these kind of plants love. Avoid using regular garden soil, as it can become compacted and hinder drainage in containers.

Planting

Fill the bottom of the container with a layer of gravel or broken pottery to improve drainage. Then, partially fill the container with the potting mix. Carefully remove the shrub from its nursery container and place it in the centre of the pot. Add more potting mix around the root ball, ensuring that the top of the root ball sits slightly below the rim of the pot. Spread a thick layer of mulch over the surface to keep the compost moist.

Watering

Water the newly planted shrub thoroughly to settle the soil and eliminate air pockets. Keep the soil consistently moist but not waterlogged, as excessive moisture can lead to root rot. Water when the top inch of soil feels dry to the touch.

Proper placement

Place the container in a location that receives the appropriate amount of sunlight for the specific shrub that you have planted. Most acid-loving shrubs prefer partial shade or filtered sunlight, although some varieties may tolerate full sun or full shade.

Winter Protection

Well hopefully we’ve seen the last of the really cold weather but come winter you’ll need to provide protection for the shrubs. Wrap them in fleece or move them to a sheltered spot.

Posted on Leave a comment

Can I re-use compost?

If you’ve been growing bubs and bedding plants, you’re likely have some spent compost at the end of each growing season. To keep waste to a minimum, you can reuse this compost in the garden.

Here’s how;

Soil Amendment – Spent compost can be used as a soil amendment to improve soil structure, moisture retention, and nutrient content. Tip out spent compost, remove any large sections of root and work it back to a smooth texture. Then add handfuls of new compost working to a ratio of 70% spent compost to 30% new compost.  You can then mix it into garden beds, raised beds, or container gardens and it can help improve soil fertility over time.

Mulching – Spread the compost around plants as mulch. Mulching helps retain soil moisture, suppress weeds, and gradually release nutrients into the soil as it decomposes.

Composting – Although the used compost has already been through one cycle, it can still be added to a compost pile or bin. It will further break down and contribute organic matter to the compost, enriching it with nutrients.

Top Dressing – Use as a top dressing for lawns. It can help improve soil structure and fertility, leading to healthier grass growth.

Potting Mix- Mix it with other ingredients like perlite, vermiculite, and peat moss to create a custom potting mix for container plants. This mix can provide nutrients and improve water retention in pots.

Vegetable Gardens – Vegetable gardens can benefit from it as it will replenish nutrients depleted by previous crops. It can help improve soil fertility and support healthy plant growth.

Tree and Shrub Plantings – When planting trees and shrubs, mix some spent compost with the backfill soil. This can provide a nutrient boost to the newly planted specimens and improve soil structure around their roots.

However, remember to avoid using spent compost from diseased plants, as it may contain pathogens that could harm new plants. Additionally, if the spent compost was treated with chemicals or pesticides, it may not be suitable for use in gardens or edible crops.